Category: project life

  • project life 2014 : weeks 17 – 18

    This spread is from April 21 to May 4. I am still loving my simple layouts, but I do miss all the playing with paper and supplies that I used to do. That’s why I’ve been thinking so much about trying art journaling lately. I even went so far as to gather some supplies together last weekend. Of course I’ll let you know how that goes if I get around to it. :)

    project life 2014 weeks 17-18

    These were a regular couple of weeks. I love the bottom left photo of us reading at bedtime.

    project life 2014 weeks 17-18

    I also wrote in a bit more detail about the healthy habits I’ve been incorporating, specifically running.

    project life 2014 weeks 17-18

    project life 2014 weeks 17-18

    project life 2014 weeks 17-18

    I just love this photo of the kids. Meredith is so pretty when she’s not doing her cheese face, and Liam’s expression cracks me up.

    project life 2014 weeks 17-18

    Yesterday Meredith and I were home sick recovering from a stomach bug, and although I missed Liam I have to say it was awesome to reconnect with her in that way. Since she wasn’t feeling great she was calm and sweet and I just had a blast playing with her and taking a long nap cuddled next to her. Today we are all feeling better and Liam rolled over from back to front for the first time so things are back to normal!

  • printing photos for project life

    printing photos for project life / kapachino

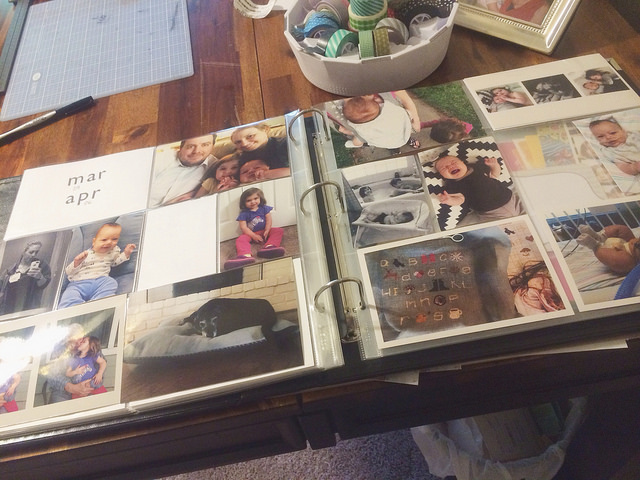
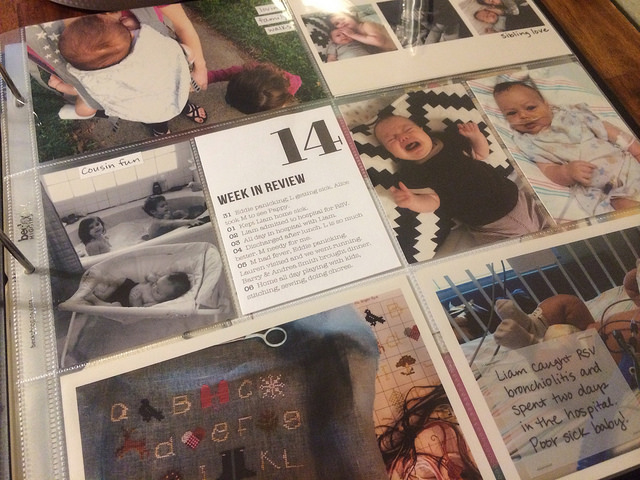
    Today I want to talk about the options of printing photos for Project Life. When you commit to doing this you really need to figure out what works best for you, because you are going to be printing a lot of photos and if you figure out how to stay on top of it you’ll be well on your way to keeping up. In my opinion it’s OVER half the battle. I’ve tried a bunch of different routes and they all have benefits and drawbacks, so let’s discuss.

    Mail delivery

    One option is to use an online service to have your photos shipped to you. Many companies offer this; I have done it before using Snapfish and I’ve heard that the quality of Persnickety Prints is awesome. I’ve also used the PostalPix app on my phone for Instagram prints and that was fun, too.

    Benefits: higher quality (usually), cheaper per print

    Drawbacks: wait time, paying for shipping (but you may be able to find a deal)

    This is a good option if you are going to do a bunch of spreads in bulk, that way you make the shipping cost worth it. If you are trying to keep up with weekly or bi-weekly spreads it might be harder since you’ll need your photos quickly.

    Same-day pickup

    This is kind of like the old one-hour photo. You still use an online service to place your order, but you choose to pick them up in-store instead of having them shipped. This is the option I use most frequently, and I’ve had good success with Snapfish. You can also do this directly through the photo lab that you choose, like Walgreen’s or Costco.

    Benefits: get your photos quickly (usually within an hour), still affordable

    Drawbacks: quality is very dependent on the photo lab you choose and might never be quite as high, the price per print is higher, limited sizing of prints

    I like this option because it enables me to complete my spreads in a timely manner but it’s still fairly affordable as far as prints are concerned. If you are going to choose this route I recommend trying a few different photo labs to test the difference in quality. I’ve found that my local Walgreen’s does a decent job and it’s super close, so I use them. I tried using Wal-Mart once and there was a whole fiasco so I stay away from them!

    Printing at home

    This might be an option to consider if you are someone who needs a lot of flexibility in your creative process, or if you aren’t going to be printing a whole lot of photos (because it can be pricey).

    Benefits: flexible, get your photos at any time almost instantly, quality can be very high depending on your printer, easy to print different sizes

    Drawbacks: the combination of initial investment in a printer, paper, and ink can get expensive

    Personally, this option is too expensive for me to rely on for all of my photos, but I do like having it available to me. I have a Canon Selphy which prints a max size of 4×6. I love it. The printer itself wasn’t too expensive, it was incredibly easy to set up, it’s quick and easy to use (I do all of my printing wirelessly from the app on my iPhone), and I love being able to use it when I just need one or two photos here and there.

    These are the main ways I know of to print photos, and I use a combination of all three depending on the situation, but same-day pickup is what I use most often! Did I miss anything? What’s your preference? Have I convinced anyone new to try Project Life yet? ;)

    ***

    Affiliate links used when possible. Thanks for your support!

  • project life 2014 : weeks 15 – 16

    IMG_5759

    This is from April 7 – 20. I have an insert for Easter, but the above is the spread without it.

    IMG_5760

    The first week Liam was still dealing with an ear infection and nebulizer treatments. So glad he’s healthy again!

    IMG_5761

    This picture of me and Meredith is my favorite in the whole spread. It leant itself perfectly to journaling in the negative space.

    IMG_5762

    Then we have my favorite bluebonnet pictures, Liam’s 3-month update, a little bit about Eddie, and our zoo trip.

    IMG_5763

    IMG_5764

    Here is the insert I did for Easter. (Front on the left, back on the right.) I just wanted to include all of that stuff in one place.

    IMG_5768

    Journaled on vellum.

    IMG_5767

    And that’s it!

  • my project life process

    I wanted to share with you the exact process I go through when putting together my Project Life spreads, including the time frames. This way you can see that it’s totally doable! I put together this particular spread completely while in sole charge of the kids, so I didn’t even need dedicated alone time.

    Sunday – end of the week : sometimes I won’t get started until the following weekend, but I didn’t expect to take more pictures and we were staying home from church recovering from sickness so I got started.

    10:30am : I create an album in my photos on my iPhone which is my only camera. I put all the photos from the time period in it – for me that’s the past two weeks. Immediately I remove the ones that are super similar to each other or that don’t fit. I assess to see how many horizontal v. vertical photos I have. (5 min)

    ***

    11:20am : I look at the photos again and realize I have too many horizontals. I notice a theme with a few of them that I can combine into one 4×6. I edit these three photos on my phone (I use PicTapGo) & upload them to Flickr so I can access them on my laptop. Then I get on my computer to format them in Photoshop Elements. I also find another set of photos on my computer to edit in PSE. (20 min)

    11:40am : I edit all other photos on my phone and upload them to Snapfish, which is what I use to order prints. (20 min)

    12:00pm : Do some brief editing on Snapfish – just cropping to 4×6 and adding a white border to some. (2 min)

    12:06pm : Place my photo order.

    ***

    3:30pm : David brings home my prints. They were available to pick up at Walgreen’s within an hour, but I wait and let him pick them up for me when he was out already. I arrange them briefly. (2 min)

    ***

    6:22pm : I fill out and print the week in review cards using PSE. (18 min)

    Saturday following

    9:00am : I add brief journaling using white labels and vellum. I end up switching a couple photos around. Realize I had a few extra things that I thought about including (a postcard from a friend, the daycare report from Liam’s first day, and his hospital bracelet). I decide to leave them out and put them in the big envelope at the back of the album instead. (15 min)

    9:15am : Step back and call it done!

    As you can see, choosing and editing photos is a lot more time consuming than putting the spread together has to be. If I can only keep on top of that, then I know I will stay caught up. This week I didn’t even use any extras, even with the core kits, but only the supplies you see in the photo above.

    I still love this project, and have really streamlined my process. This works for me even with our very full life!

  • project life 2014 : weeks 13 – 14

    This spread is from March 24 to April 6. It was my first week back at work, and the week Liam was in the hospital.

    IMG_5594

    Lots of photos here. Mostly people. I love that, but I think I would also like more pictures of our environment – the rooms we spend time in, our neighborhood, etc. I like seeing that stuff when I look back, so I’ll work on that.

    IMG_5595

    Those pictures with Meredith and her Pappy (David’s grandfather) are especially sweet because he just had a stroke last week. He is still okay, but lost his language, some strength, and fine motor skills.

    IMG_5596

    Week in review cards are still awesome.

    IMG_5597

    As is journaling on vellum!

    IMG_5598

    IMG_5599

    IMG_5600

    IMG_5601

    When I was putting together this week’s spread I took notes on my process. Soon I’ll be sharing with you how I do it, step by step, including how much time it takes me.