Author: Kathleen

  • link roundup / 1

    Today I’m sharing some stuff I found around the internet. Enjoy!

    great tips for the beginning memory keeper.

    > I want to get serious about making my own natural cleaning products.

    > finding this series on money saving incredibly helpful.

    > Rachel makes me want to try art journaling.

    > I just came across this sewing/craft room and it’s so inspiring.

    > Stephany has been writing weekly weigh-in posts and it’s been very encouraging for me as I try to get healthy again.

    > two relatively new podcasts that I look forward to every week are Elise Gets Crafty and The Lively Show.

    Happy weekend!

  • in my bag

    My bag situation has changed quite a bit from the past, so I wanted to share!

    13974352715_c945a92575_z

    That’s my bag there. It’s the transport tote from Madewell and it’s my dream. My husband spoiled me with it for my birthday and it’s amazing. This is what I keep inside:

    13974792914_a7eaaf68c2_z

    1 – Whatever book I’m currently reading (or the Kindle). Currently it’s Lexicon by Max Berry.

    2 – My wallet. It’s an old one by Fossil.

    3 – This is a RuMe foldable bag I got at Target. I use it for shopping trips or whenever I need an extra bag.

    4 – My bullet journal, which is a Moleskine cahier squared notebook.

    5 – Thieves essential oil by Young Living. I have this in my bag because I get sores on my tongue and this stuff heals them in like two days which is amazing.

    6 – My house key. The keychain is my late dog Cleo’s tag.

    7 – Work name badge.

    8 – A Sharpie pen, my favorite.

    9 – Zipper pouch from Etsy seller Half Orange Handmade.

    13974350535_691dcd474b_z

    I love this little pouch. It’s the perfect size for all your extras, and the quality is excellent. I keep boring stuff inside:

    13974343165_ec82523d71_z

    1 – Mini scissors, because you never know when you’ll need them!

    2 – A phone charger plug.

    3 – Tiny Tupperware container to stash emergency headache meds.

    4 – Abreva, because I also get cold sores on my lip every few years and you’ve got to attack those suckers when you first feel them coming on.

    5 – Lanolin, which I use for my lips.

    I also throw in my water bottle when I’m going to work, and if I’m going somewhere quick with the kids I put a few diapers, wipes, and a change of clothes for the baby in a wet bag and all of that fits in there easily. When I don’t need the baby stuff I just take the wet bag out. I am super minimalist when it comes to baby stuff so I really don’t even need a diaper bag. The kids each have a bag for daycare, and if we are going to be gone from the house for awhile I will just grab one of those to fit in extra diapers. It works!

    What’s your bag situation?

  • works in progress

    13968904922_f76ccbdd27_z

    I finished the winter sampler I was working on, and now I just need to frame it. I love it a lot.

    13969128852_b34061d6aa_z

    Also done with my quilt top! It looks okay from a distance, but get up close and you can see how I screwed up with a rookie mistake:

    13972309555_9fcbaeb27d_z

    I totally didn’t account for the seam allowance and so the tips of my triangles are cut off. I’m not too bothered by it though, and I learned my lesson! You can see here that I have it marked off for quilting. Yes I am going to hand quilt it. I may regret it but I will be pretty proud when it’s done. :)

    I am kind of at a stand-still with the quilt for now until I can get my hands on some batting. Craft supplies aren’t in the budget for now, so I am hoping to come across someone who has some to give away.

    13968873332_85123f4c4f_z

    Lastly, I started working on Liam’s stocking! I want to tackle this at a slow and relaxed pace instead of rushing to get it done for Christmas. I love felt needleworks projects now, so I’m excited to have it going!

  • thrifty decorating ideas // on the wall

    Even though we are on a tight budget, I figure I can still do some decorating around the house. There are always the craft supplies I already own, thrift stores, and “shopping” at Mom & Dad’s house. :) In this new series I’m going to share with you some ideas I’ve found for thrifty decorating. Since I’m working on our gallery wall in the master bedroom, the first edition is focused on stuff you can make to hang on the wall other than traditional photos or prints.

    13785345015_3ba61650fe_z

    woven wall hangings – I’ve already done one of these, and I love it. This link takes you to a great tutorial on how to do it by making your own loom, and it includes several ideas for making them interesting. I can’t wait to try some new techniques.

    13785344775_a4a06824ac_z

    felt banner – there are so many options for this idea! I actually made one this past weekend very similar to the one pictured. It was SO fast and easy, and I already had all the supplies on hand. I want to make more in the future that are seasonal or holiday-themed.

    13785345055_47fc8159b9_z

    geometric photo display – I think this is so cool. All you need are nails, some kind of string, clips, and photos.

    13785344805_242eae534f_z

    quilted wall hanging – this one might be a little more involved, but if you can sew a straight line I think you can do it, just using fabric scraps. I’m really excited to try it.

    packing tape transfer art – couldn’t get a picture of this one, but click through the link to see what I’m referring to. You make art using packing tape and magazines and it’s super cool.

    So, any other ideas for stuff to hang on the wall? Have you tried any of these?

  • my project life process

    I wanted to share with you the exact process I go through when putting together my Project Life spreads, including the time frames. This way you can see that it’s totally doable! I put together this particular spread completely while in sole charge of the kids, so I didn’t even need dedicated alone time.

    Sunday – end of the week : sometimes I won’t get started until the following weekend, but I didn’t expect to take more pictures and we were staying home from church recovering from sickness so I got started.

    10:30am : I create an album in my photos on my iPhone which is my only camera. I put all the photos from the time period in it – for me that’s the past two weeks. Immediately I remove the ones that are super similar to each other or that don’t fit. I assess to see how many horizontal v. vertical photos I have. (5 min)

    ***

    11:20am : I look at the photos again and realize I have too many horizontals. I notice a theme with a few of them that I can combine into one 4×6. I edit these three photos on my phone (I use PicTapGo) & upload them to Flickr so I can access them on my laptop. Then I get on my computer to format them in Photoshop Elements. I also find another set of photos on my computer to edit in PSE. (20 min)

    11:40am : I edit all other photos on my phone and upload them to Snapfish, which is what I use to order prints. (20 min)

    12:00pm : Do some brief editing on Snapfish – just cropping to 4×6 and adding a white border to some. (2 min)

    12:06pm : Place my photo order.

    ***

    3:30pm : David brings home my prints. They were available to pick up at Walgreen’s within an hour, but I wait and let him pick them up for me when he was out already. I arrange them briefly. (2 min)

    ***

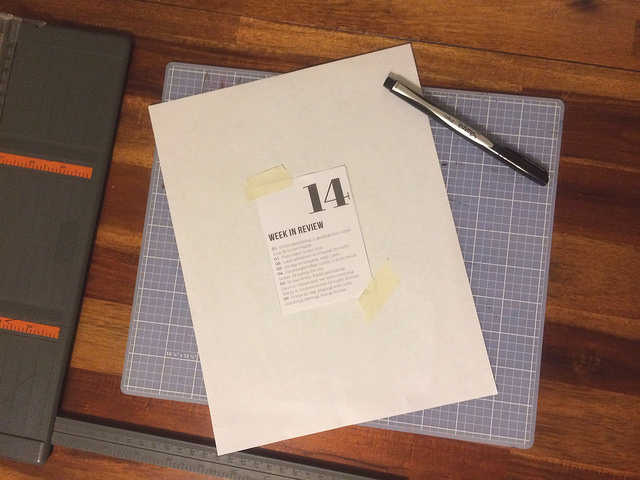
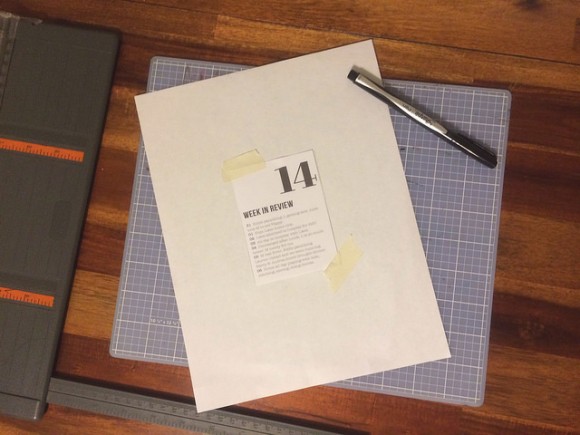
    6:22pm : I fill out and print the week in review cards using PSE. (18 min)

    Saturday following

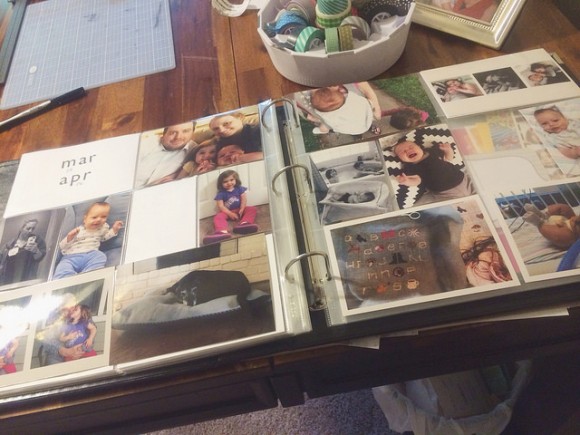
    9:00am : I add brief journaling using white labels and vellum. I end up switching a couple photos around. Realize I had a few extra things that I thought about including (a postcard from a friend, the daycare report from Liam’s first day, and his hospital bracelet). I decide to leave them out and put them in the big envelope at the back of the album instead. (15 min)

    9:15am : Step back and call it done!

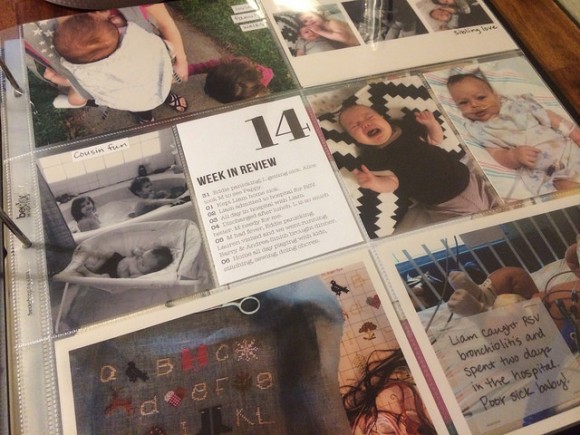
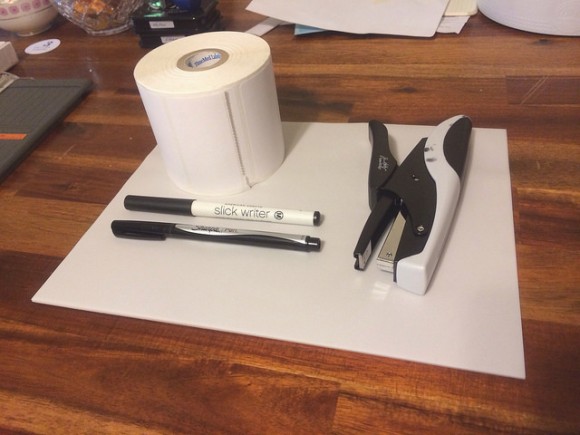
    As you can see, choosing and editing photos is a lot more time consuming than putting the spread together has to be. If I can only keep on top of that, then I know I will stay caught up. This week I didn’t even use any extras, even with the core kits, but only the supplies you see in the photo above.

    I still love this project, and have really streamlined my process. This works for me even with our very full life!